
Bridles are an essential part of most entertainment rigging systems. Whether it’s a straight-drop dead hang or a multi-leg bridle, your bridles’ goal remains the same: to have the flown equipment for your production or event hang precisely.
Successful bridle design can be complex. It requires understanding bridle geometry, such as the angles of legs, the forces acting on them, and, importantly, how to communicate this information effectively to your on-site rigging team.
Luckily, Vectorworks Spotlight’s Bridle tools suite can help you overcome these challenges, so keep reading to learn how you can maximize the tools’ capabilities and improve your rigging design workflows.
Drawing Bridles in Vectorworks Spotlight
All bridle-related settings in Vectorworks Spotlight 2025 are conveniently located within the Bridle tool for different types of bridles. This ease of use ensures that you can simply adjust the drawing settings for different scenarios.

Setting Tool Preferences
One key to drawing bridles is understanding how to set the preferences of your Bridle tool. For example, when designing a dead-hang bridle, you should set the upper-leg length to match the size of a standard 3.25t shackle, ensuring your dead hang is drawn with a single leg.
Leg Angle Settings
A Bridle Leg Angle in Vectorworks Spotlight is the angle between a bridle leg and the horizontal plane at the rigging point. Understanding this distinction is important when setting the Minimum Leg Angle in your tool’s settings.
Using a Hoist as Down Leg
If you plan on using as a hoist a down leg in your bridle system, set your bridle’s Apex Height to match the Maximum Chain Length of the hoist. This makes sure that your hoist can reach the ground, allowing you to add down-leg steel between the hoist and apex later using the Down-Leg parameter in the Bridle properties.
Inserting a Hoist First
When drawing, you can insert a hoist and add the bridle later. This will give you more flexibility, since you can define the down-leg steel while drawing.
Setting Standard Shackle Types
Lastly, save time when drawing by setting a Standard Shackle Type in your tool settings. This saves you from having to manually change it later.
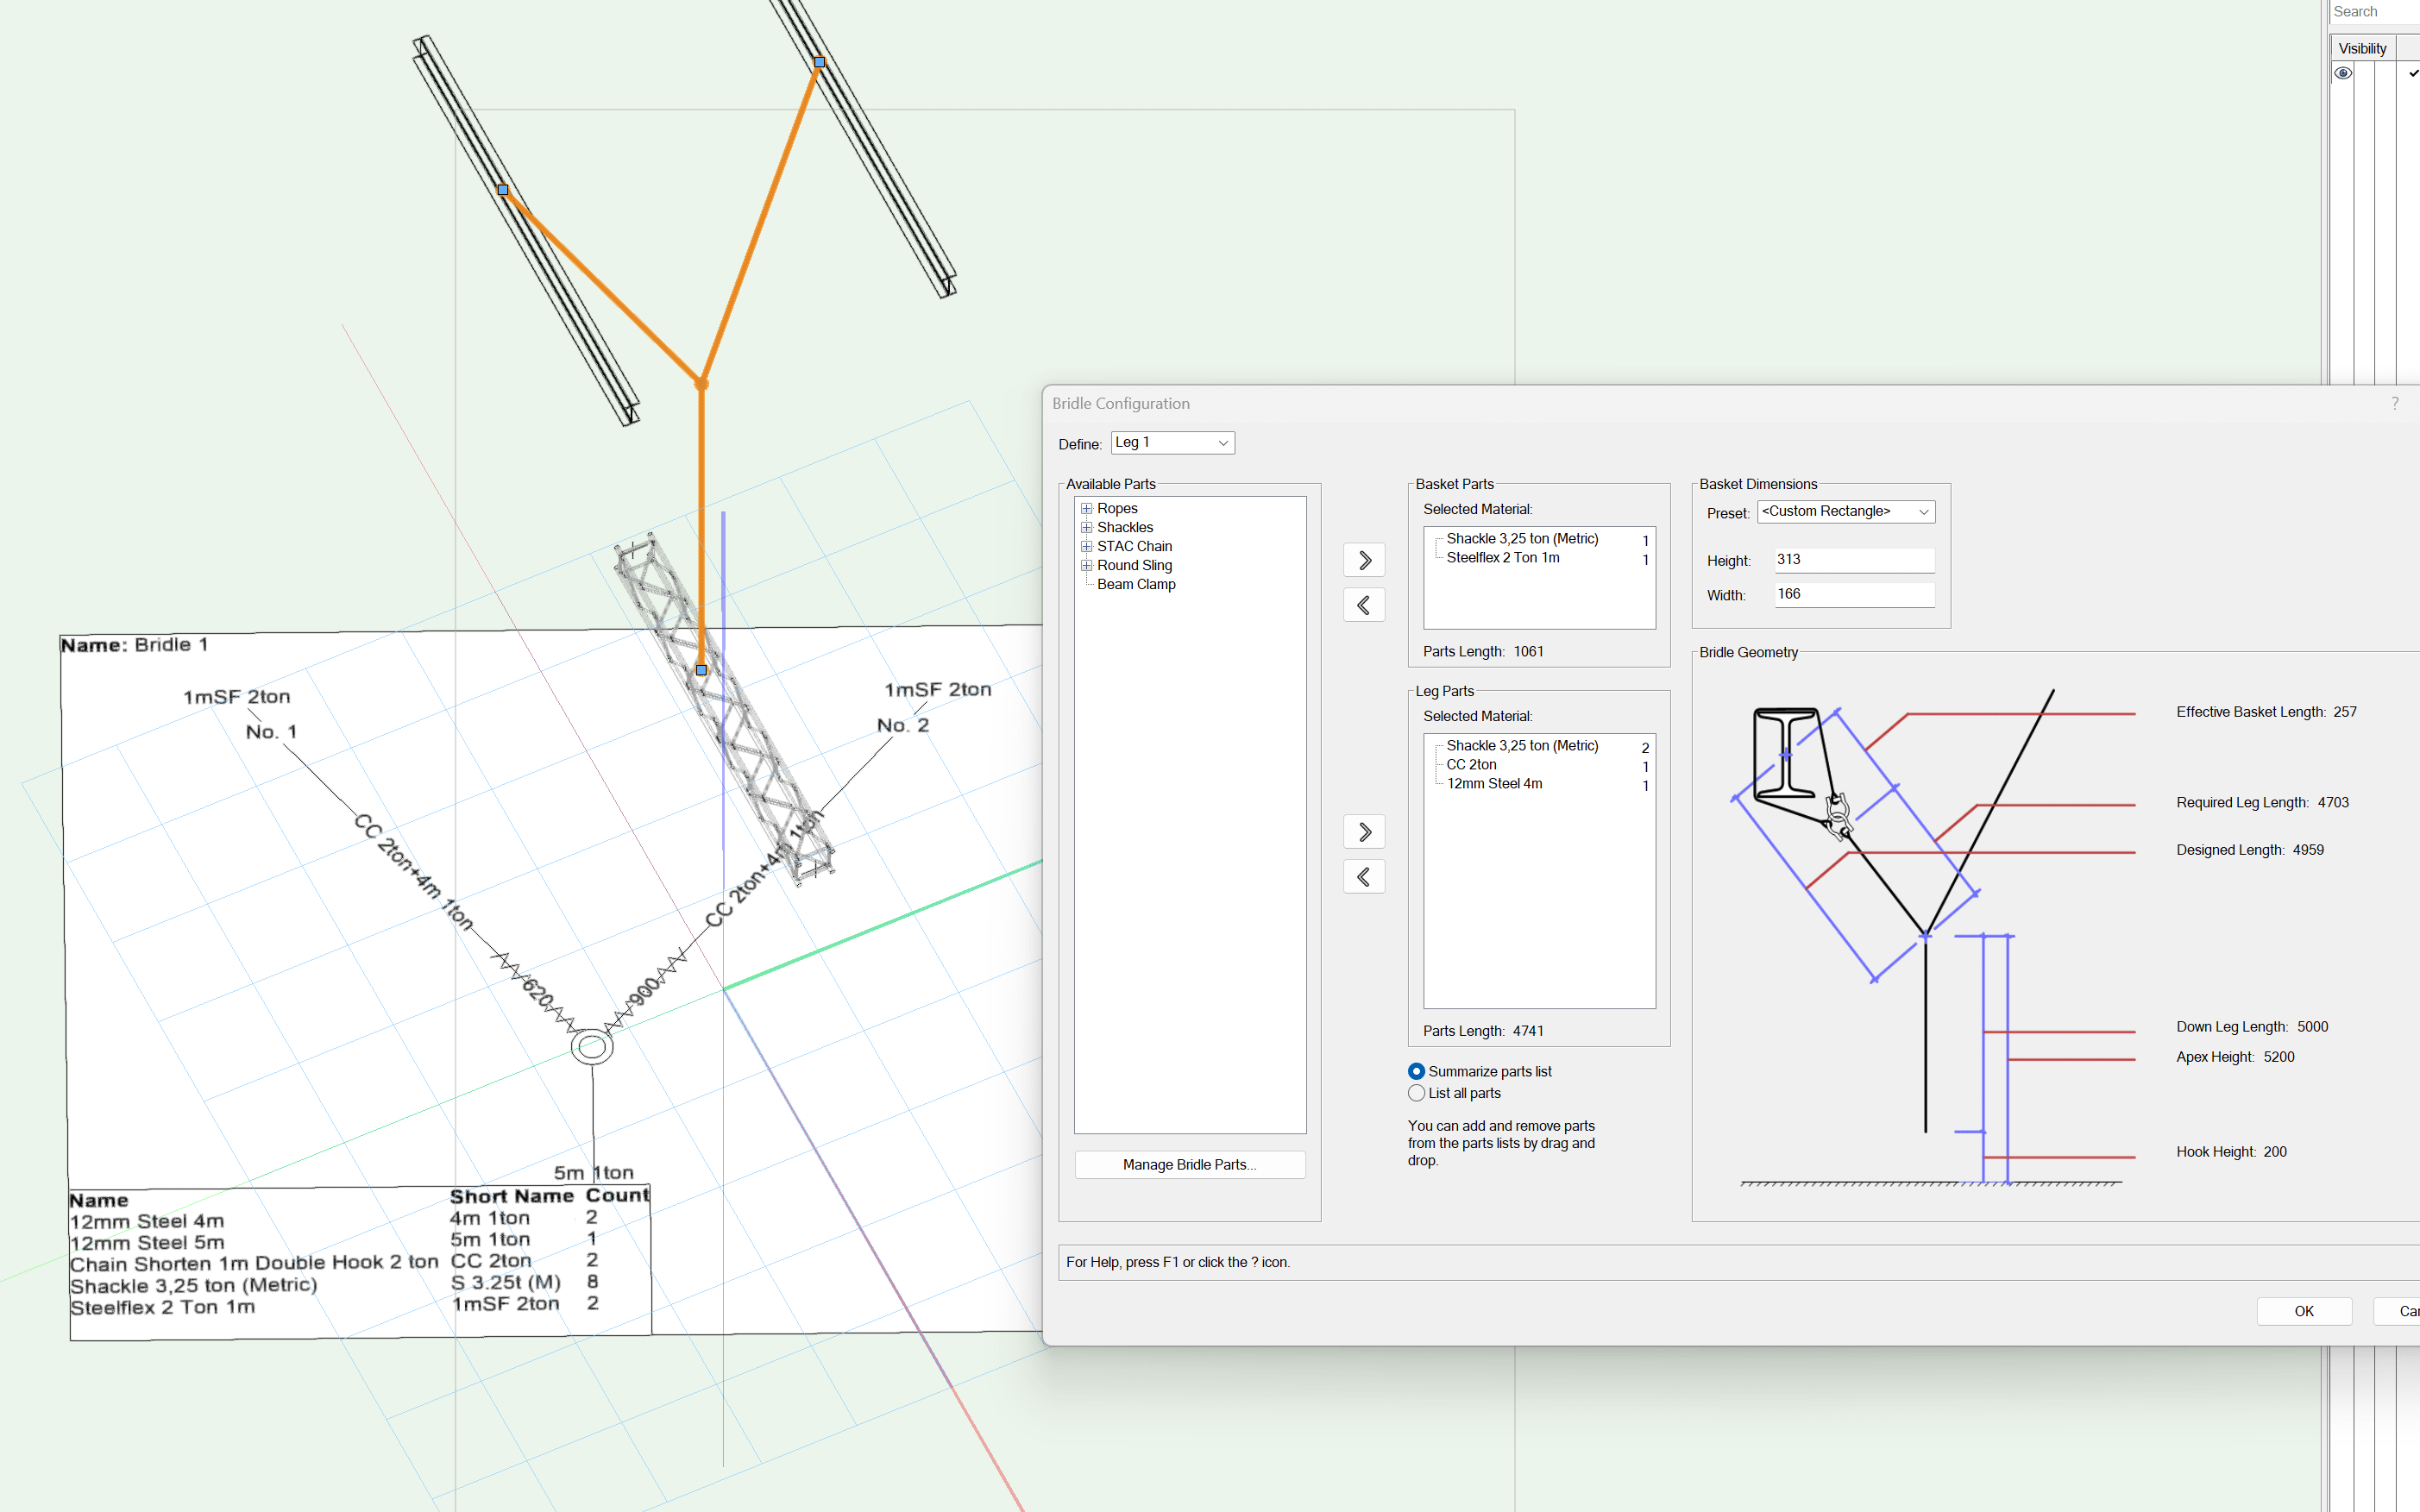
Configuring Bridles in Vectorworks Spotlight
Drawing your bridles is just the first step in successful entertainment rigging; you also need to configure them to fit the specific needs of your production.
Adjusting Bridle Properties
The Bridle Properties panel offers a quick way to adjust bridle leg lengths and other physical parameters after drawing, meaning you don’t have to manually reshape legs.
Group Editing
Speaking of efficiency, you can also edit the properties of a group of selected bridles simultaneously. This capability is especially helpful on larger projects.

Documenting Bridles in Vectorworks Spotlight
Clear, detailed communication with your warehouse staff and on-site crew is necessary for the successful preparation and installation of bridles. It’s at this point in your bridle workflow where bridle assembly diagrams become pivotal.
You can use these diagrams to show how each bridle should be built, providing your team with information like the precise length of each STAC or choke chain so they can build and prepare the gear for installation.
From your bridles’ part configurations, you have the capability to quickly produce booking and packing lists for bridle steels and other parts using the Bridle Report command. Your report can cover your entire project, or multiple reports can be generated for larger projects.
With versatile workflows in Vectorworks, you have the flexibility to create all sorts of creative solutions to communicate to your rigging teams.
Spotlight Rigging + Braceworks
Now that you understand the importance of and how to use bridles in Vectorworks Spotlight, it’s time for a more in-depth exploration of Vectorworks Spotlight’s rigging tools.
The “Spotlight Rigging + Braceworks” course on Vectorworks University is perfect for not only riggers, but technical directors, lighting designers, sound engineers, and more. This class is structured in two main parts to provide you with a holistic understanding and a practical application of Vectorworks Spotlight and Braceworks’ rigging tools.
Learning objectives for this course also include:
· Understand and utilize truss, pipes, and ladders in your rigging designs.
· Efficiently connect various loads to the rigging structure.
· Integrate and configure hoists in your rigging system.
· Design and implement bridles for complex rigging configurations.
· Utilize worksheets and data for rigging management and documentation.
· Incorporate Braceworks to perform accurate load calculations and analysis.
On-Demand
Learn at your own pace. Access this pre-recorded, instructor-led course 24/7.
Stay in the know with the latest insights
Subscribers receive news, customer stories, success and learning tips, event information, and other important announcements form Vectorworks.
By submitting this form, you agree that Vectorworks, Inc. and its authorized partners may contact you in regards to news, offers, and the use of our software, services, and platforms. Learn more about our privacy practices and your data on our privacy page.*