3D modeling tools and workflows in Vectorworks offer a simple yet powerful way to bring your projects to life. Working in 3D grants you several advantages, such as the ability to make more-informed design decisions and to collaborate more effectively.
If you’re looking to enhance your fundamental 3D modeling skills with Vectorworks, this is the article for you. You’ll learn about modeling features from the basics to the more advanced, and you’ll also find helpful tips and tricks to keep in mind.
THE BASICS OF 3D MODELING IN VECTORWORKS
Understanding the core tools for 3D modeling is key to getting started. Here’s a quick overview of the primary operations you’ll use. Look at these capabilities as the building blocks of your journey into 3D modeling — master the functions in the list below and you’ll be well on your way to expert-level modeling in Vectorworks.
Extrude (Cmd+E, Ctrl+E)
Begin by creating a 2D shape using the drafting tools found in the Basic toolset, then extrude it by going to Model > Extrude. This command gives your shape height and turns it into a 3D object.
Push/Pull (Shift+R)
After extruding, you can reshape the object with the Push/Pull tool, which lets you drag surfaces and manipulate them to your desired outcome.
Add/Subtract Solids
To combine or remove parts from overlapping objects, use the Add Solids or Subtract Solids commands, available in the contextual (right-click) menu. These operations are especially helpful when refining complex models.
Add Solids: Cmd+Option+A, Ctrl+Alt+A
Subtract Solids: Cmd+Option+S, Ctrl+Alt+S
Fillet Edge (Shift+F)
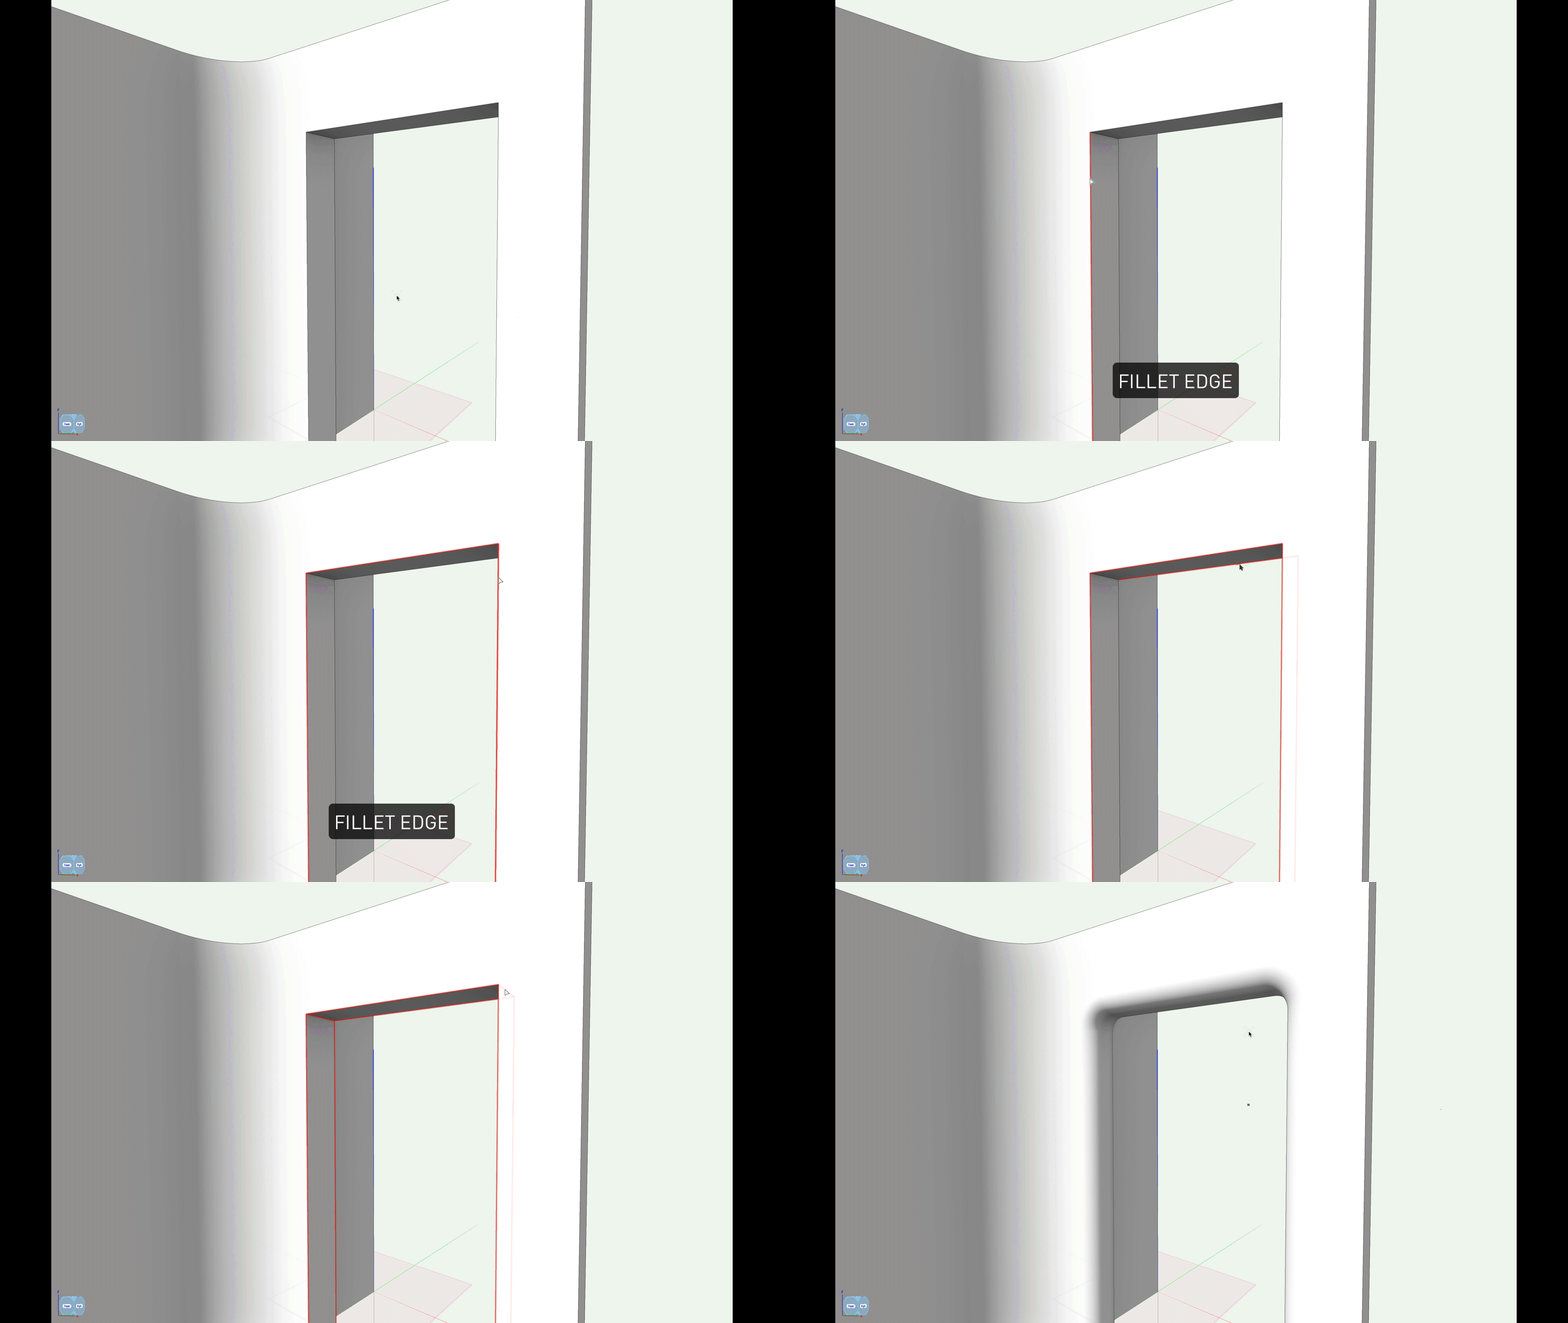
For rounded edges, use the Fillet Edge tool. You can apply a uniform radius across all edges or vary the radius to create unique, custom profiles. This flexibility is useful for creating softer transitions or emphasizing certain parts of your design.

A demonstration of the Fillet Edge tool in Vectorworks Architect.
Getting More Advanced
As your design becomes more intricate, the tools discussed below will help you stay organized and efficient with your modeling.
Set Working Plane (Shift+1)
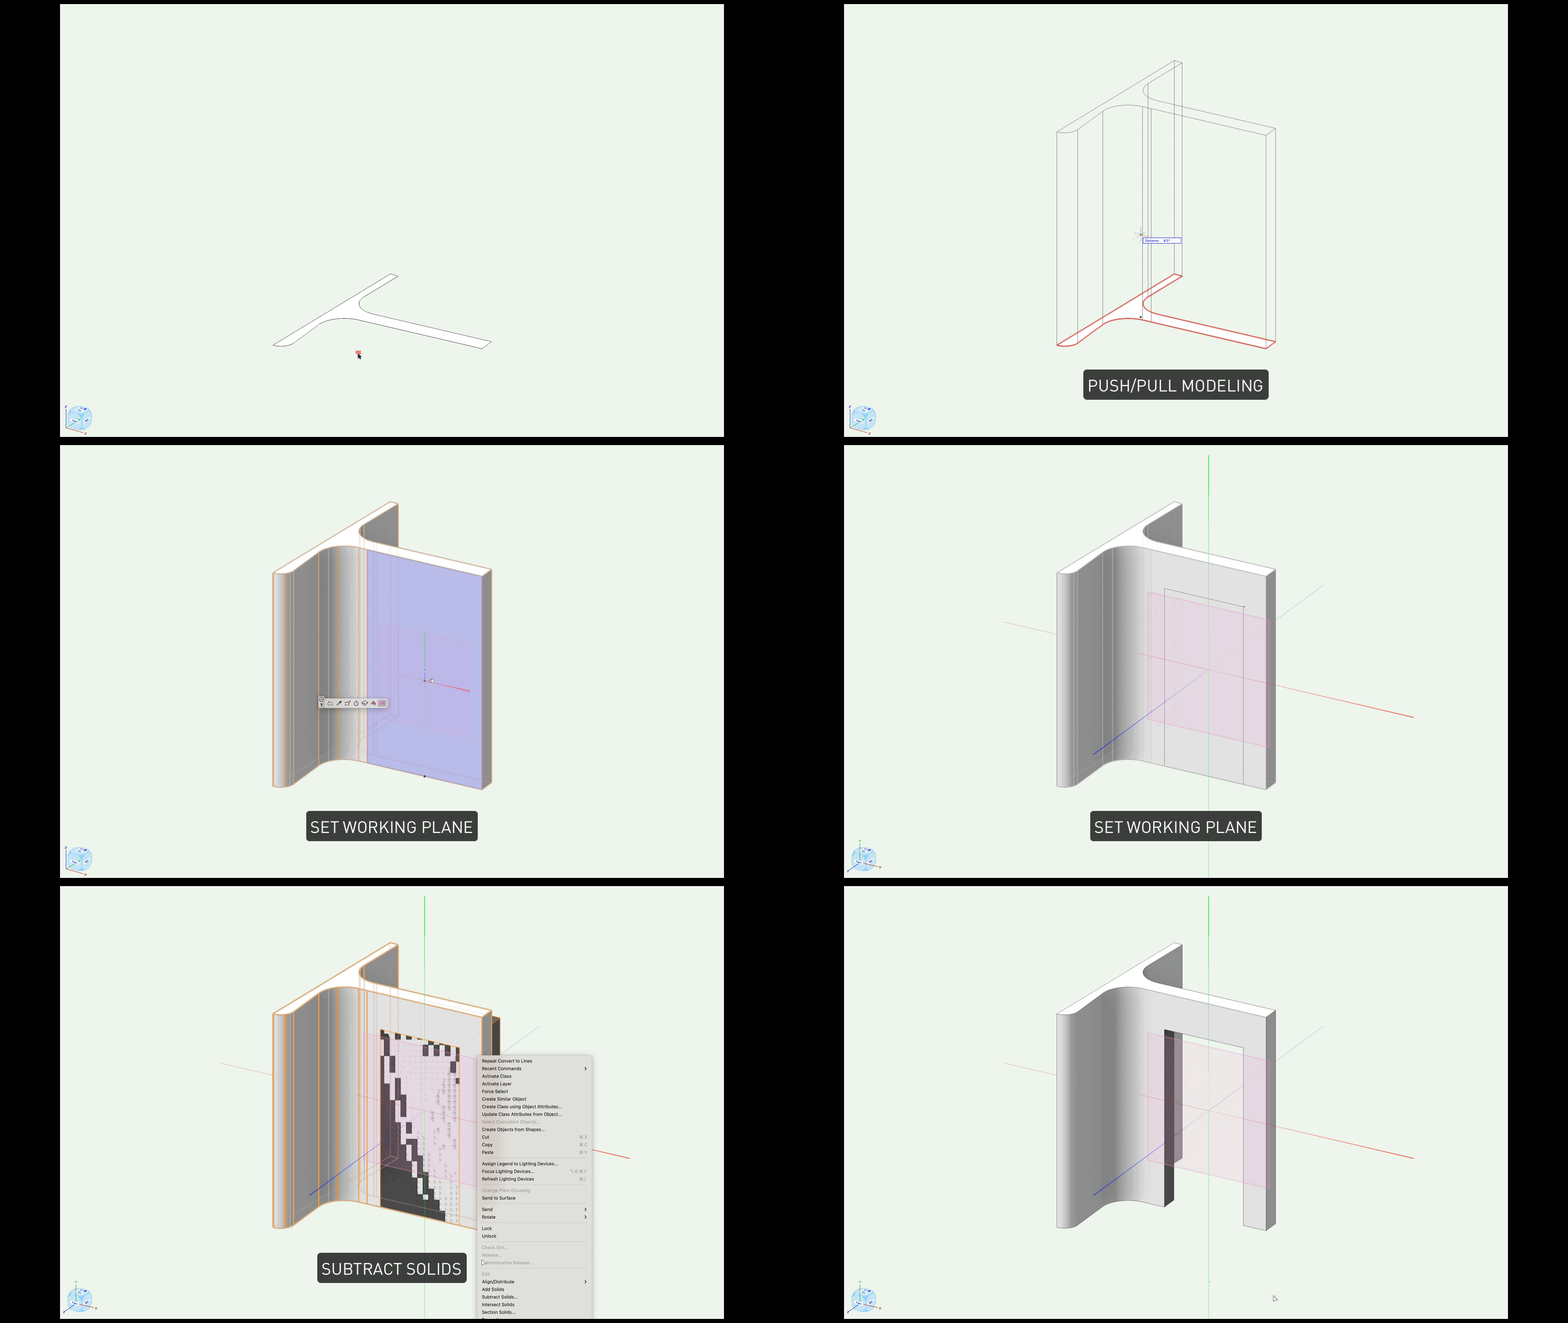
When working on detailed models, you may want to set a custom working plane to help with precision. The Set Working Plane tool allows you to define any surface or position in 3D space as your new reference plane, either by selecting a surface or defining three points in space.

A series of modeling operations and a demonstration of the Set Working Plane tool.
Offset Edge (No Default Shortcut)
Use the Offset Edge tool to create a NURBS line or curve on the face of your model. This can be extruded immediately using Push/Pull, which is ideal for creating additional geometry directly on existing surfaces.

Extract Tool (Shift+L)
The Extract tool helps you pull specific surfaces, edges, or curves from your model. This is a fantastic way to create profiles or surfaces for further manipulation.
Extrude Along Path (Cmd+Option+X, Ctrl+Alt+X)
For designs requiring complex extrusion shapes, the Extrude Along Path tool lets you define a path that a 2D profile will follow. You can choose different scaling options (uniform, non-uniform, exponential) and adjust both the path and the profile as needed.
Pro Tip: Want to create 3D text? Convert text objects into 3D models by going to Text > Convert Text to Polylines, and then extrude them for impactful typographic designs.
Tips to Keep in Mind
Editing Solid Modeling History: If you need to adjust your model, double-click the object to access its modeling history. This lets you go back to earlier stages of the design, such as solid additions or subtractions, even the intial base 2D shape, and make modifications.
Converting to Generic Solids: Some operations, like Deform and Taper Face, will convert your object into a generic solid, removing its history. This streamlines the object and reduces file size, but it’s essential to keep backups or undo changes if you need to retain flexibility in editing.
Creating Symbols: Once your model is complete, you can create symbols to reuse throughout your project. Create a hybrid symbol by adding linework to its 2D component part to ensure it looks perfect from both 3D and 2D views. This is especially useful for consistent, accurate representations in plan or elevation views.
Stay in the know with the latest insights
Subscribers receive news, customer stories, success and learning tips, event information, and other important announcements from Vectorworks.
By submitting this form, you agree that Vectorworks, Inc. and its authorized partners may contact you in regards to news, offers, and the use of our software, services, and platforms. Learn more about our privacy practices and your data on our privacy page.*